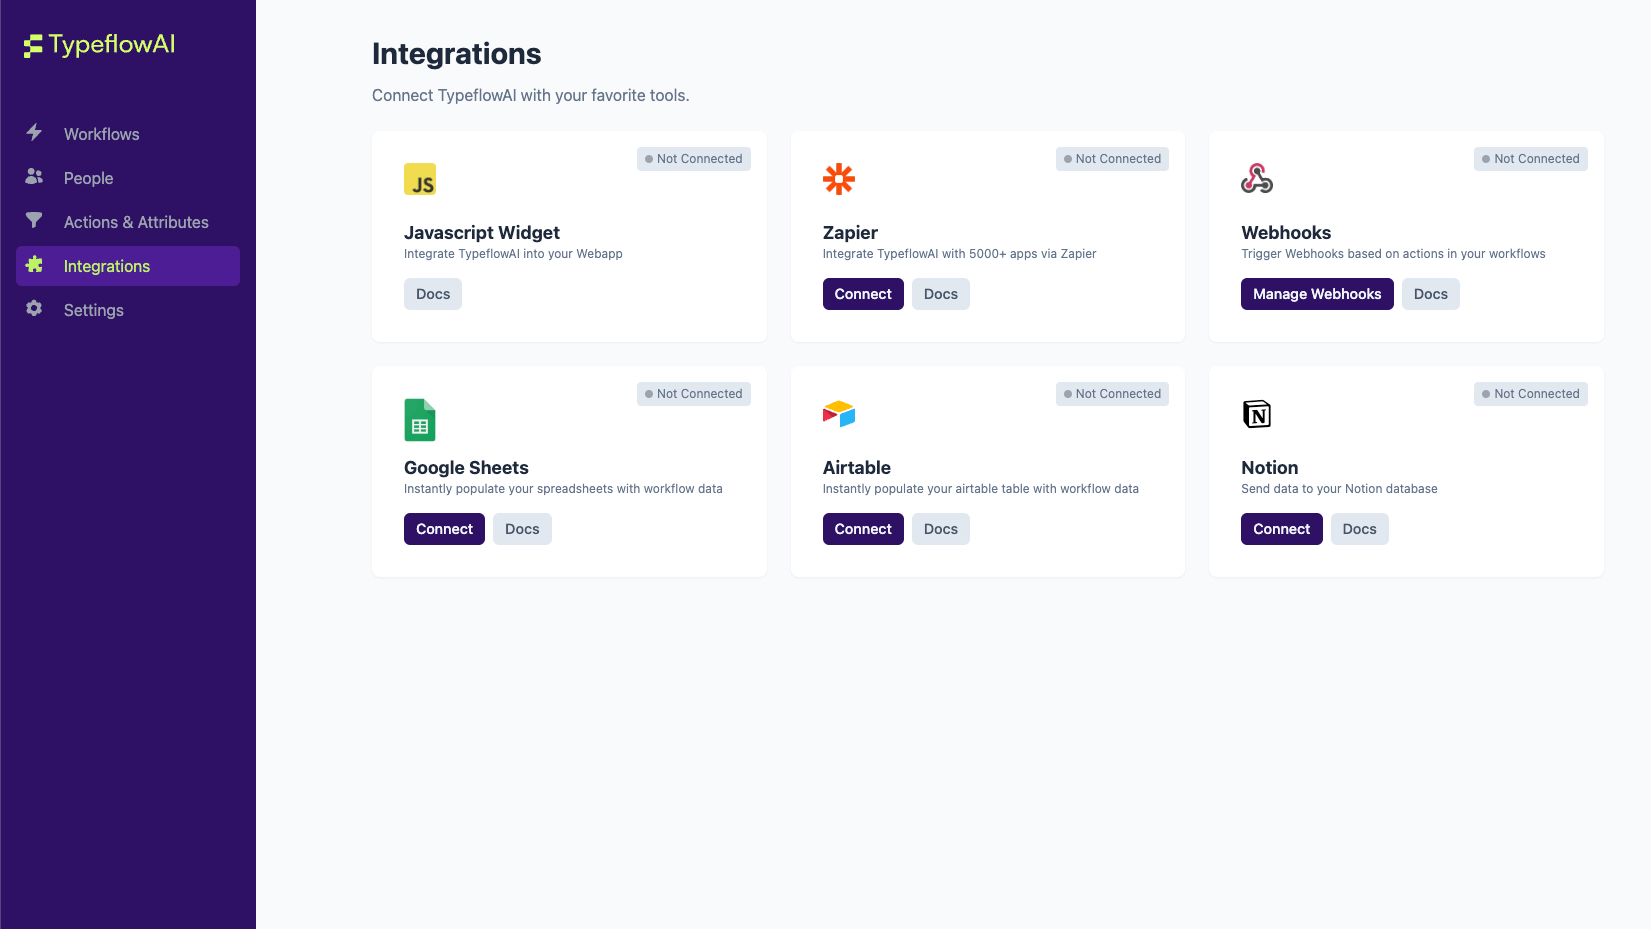
Integrations
Notion
The notion integration allows you to automatically send responses to a Notion database of your choice.
This feature is enabled by default in TypeflowAI Cloud but needs to be self-configured when running a self-hosted version of TypeflowAI.
TypeflowAI Cloud
- Go to the Integrations tab in your TypeflowAI Cloud dashboard and click on the "Connect" button under Notion integration.
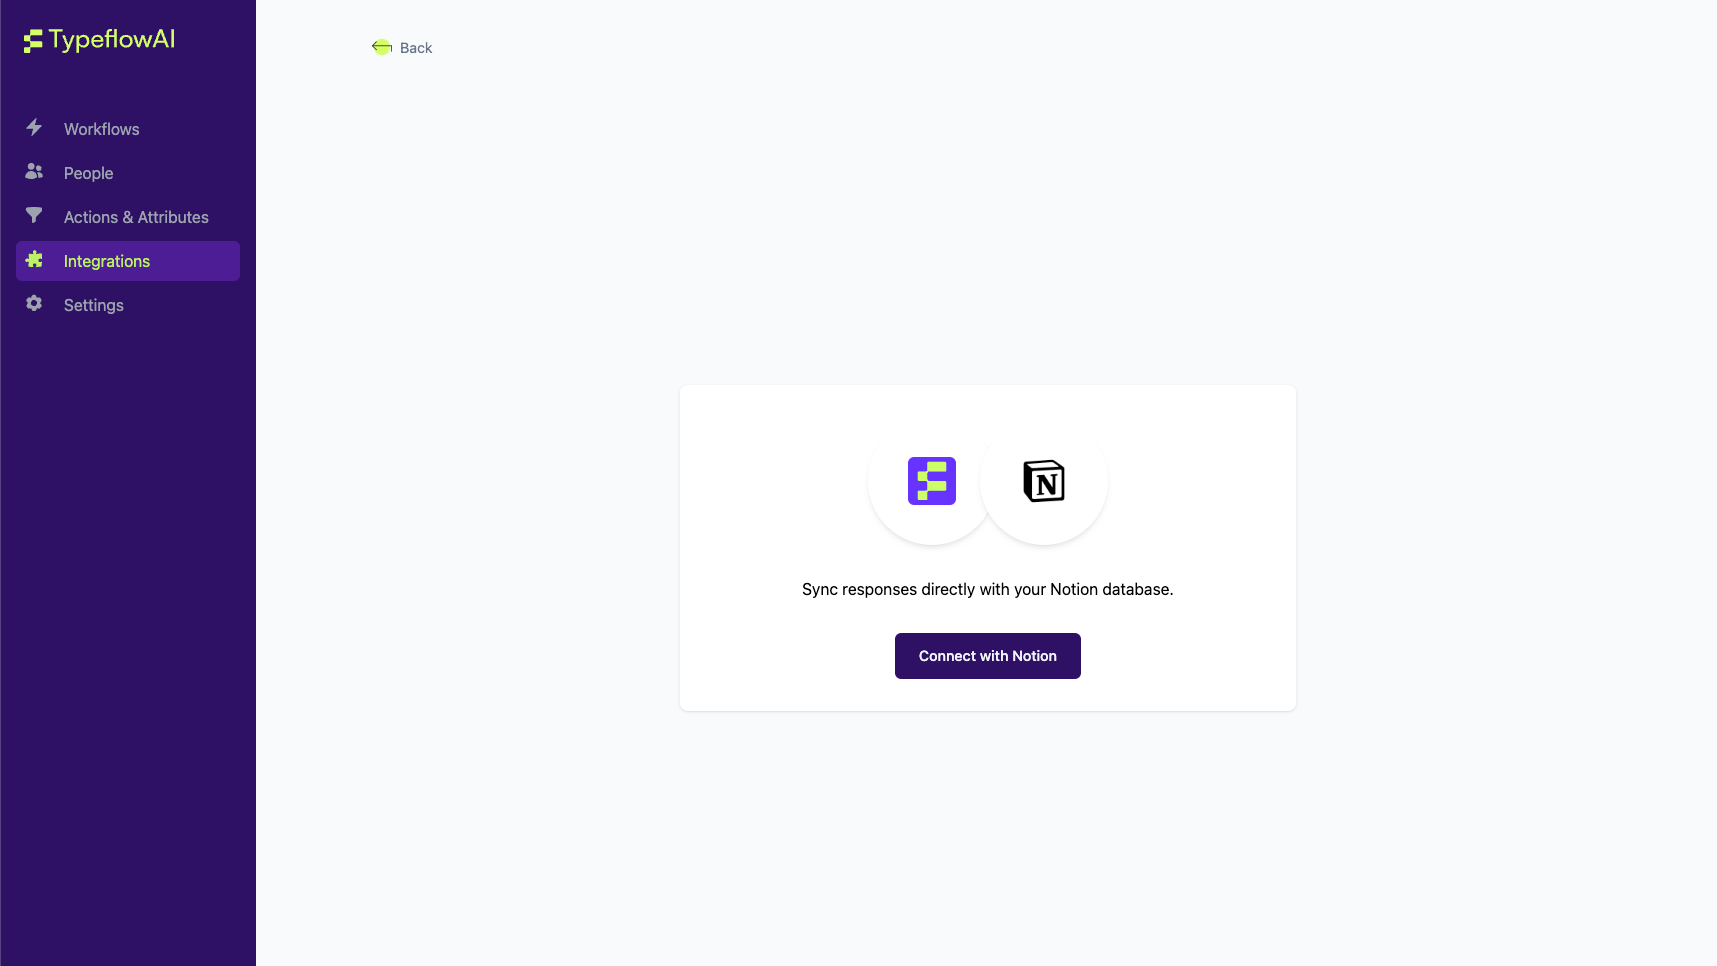
- Now click on the "Connect with Notion" button to authenticate yourself with Notion.
-
You will now be taken to the Notion OAuth page where you can select the Notion account you want to use for the integration
-
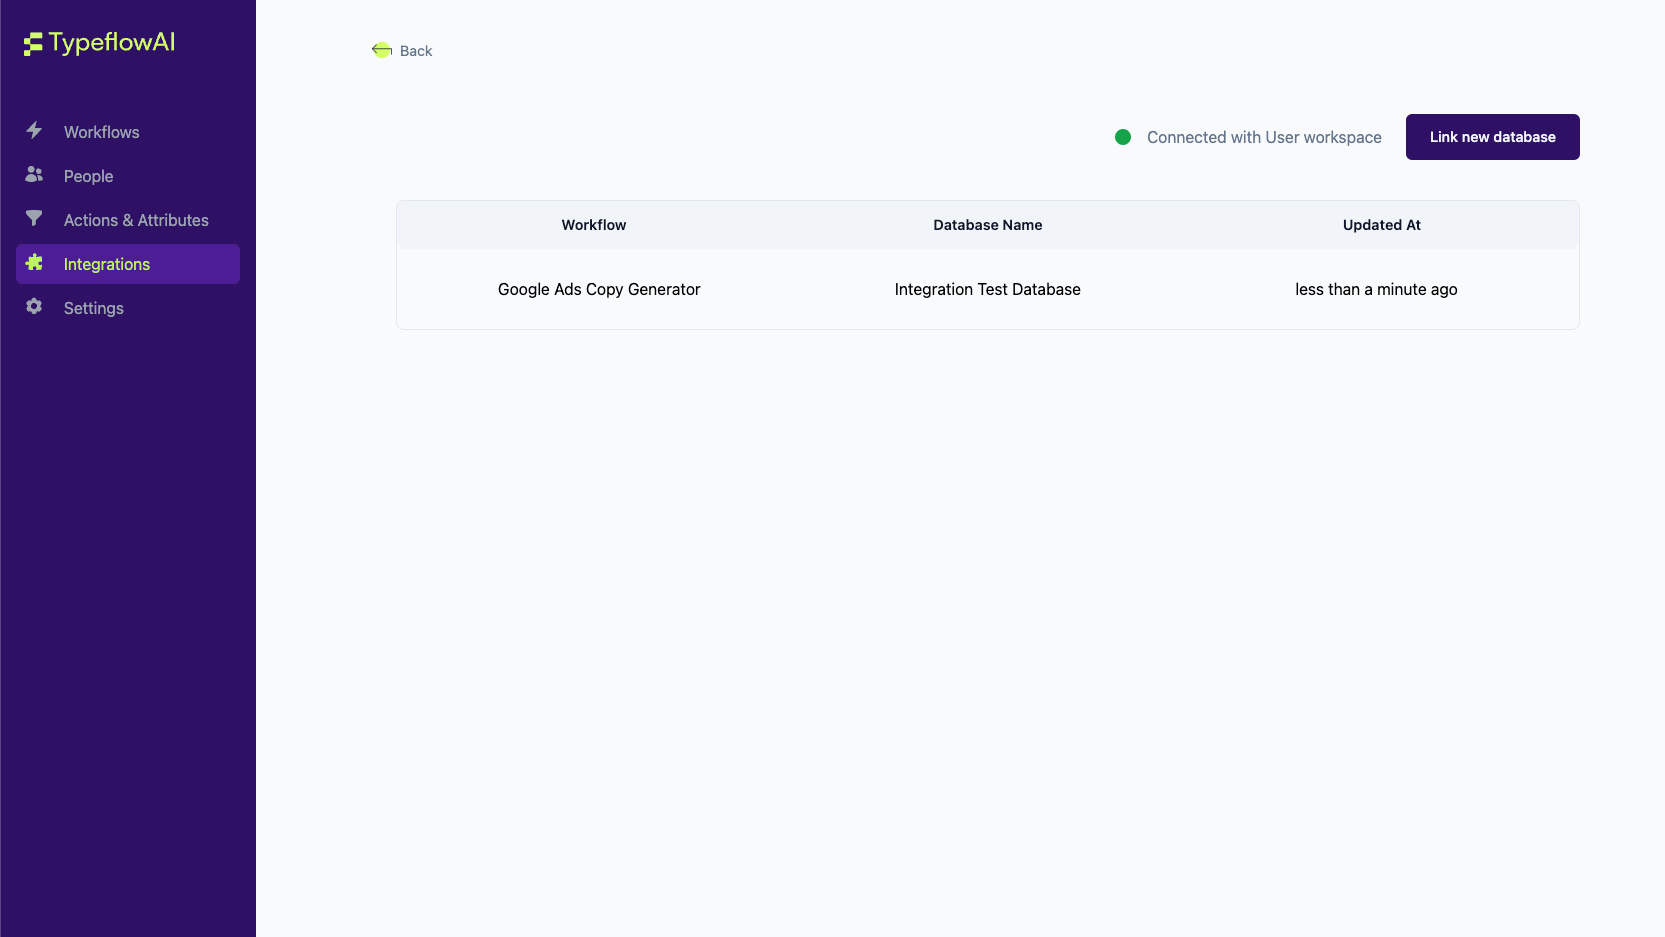
Once you have selected the account and databases and completed the authentication and authorization process, you will be taken back to TypeflowAI Cloud and see the connected status as below:

Before the next step, make sure that you have a TypeflowAI Workflow with at least one question and a Notion database in the Notion account you integrated.
- Now click on the "Link New Database" button to link a new Notion database with TypeflowAI and a modal will open up.
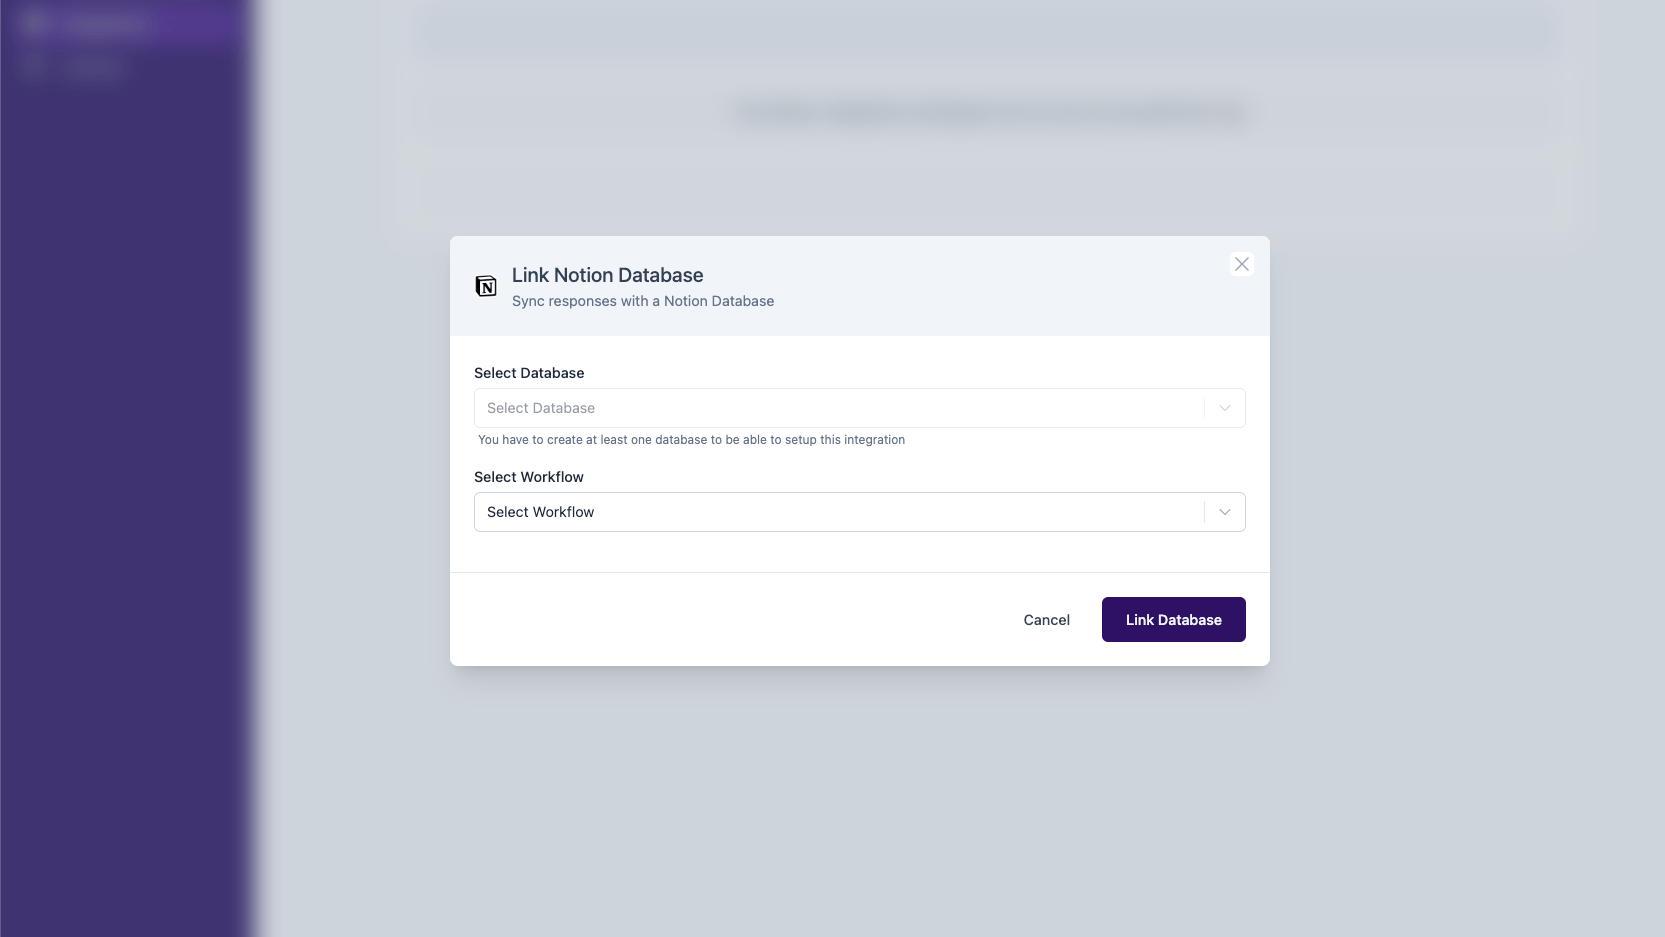
- Select the Notion database you want to link with TypeflowAI and the Workflow. On doing so, you will be asked to map typeflowai' workflow questions with selected databases' column. Complete the mapping and click on the "Link Database" button.
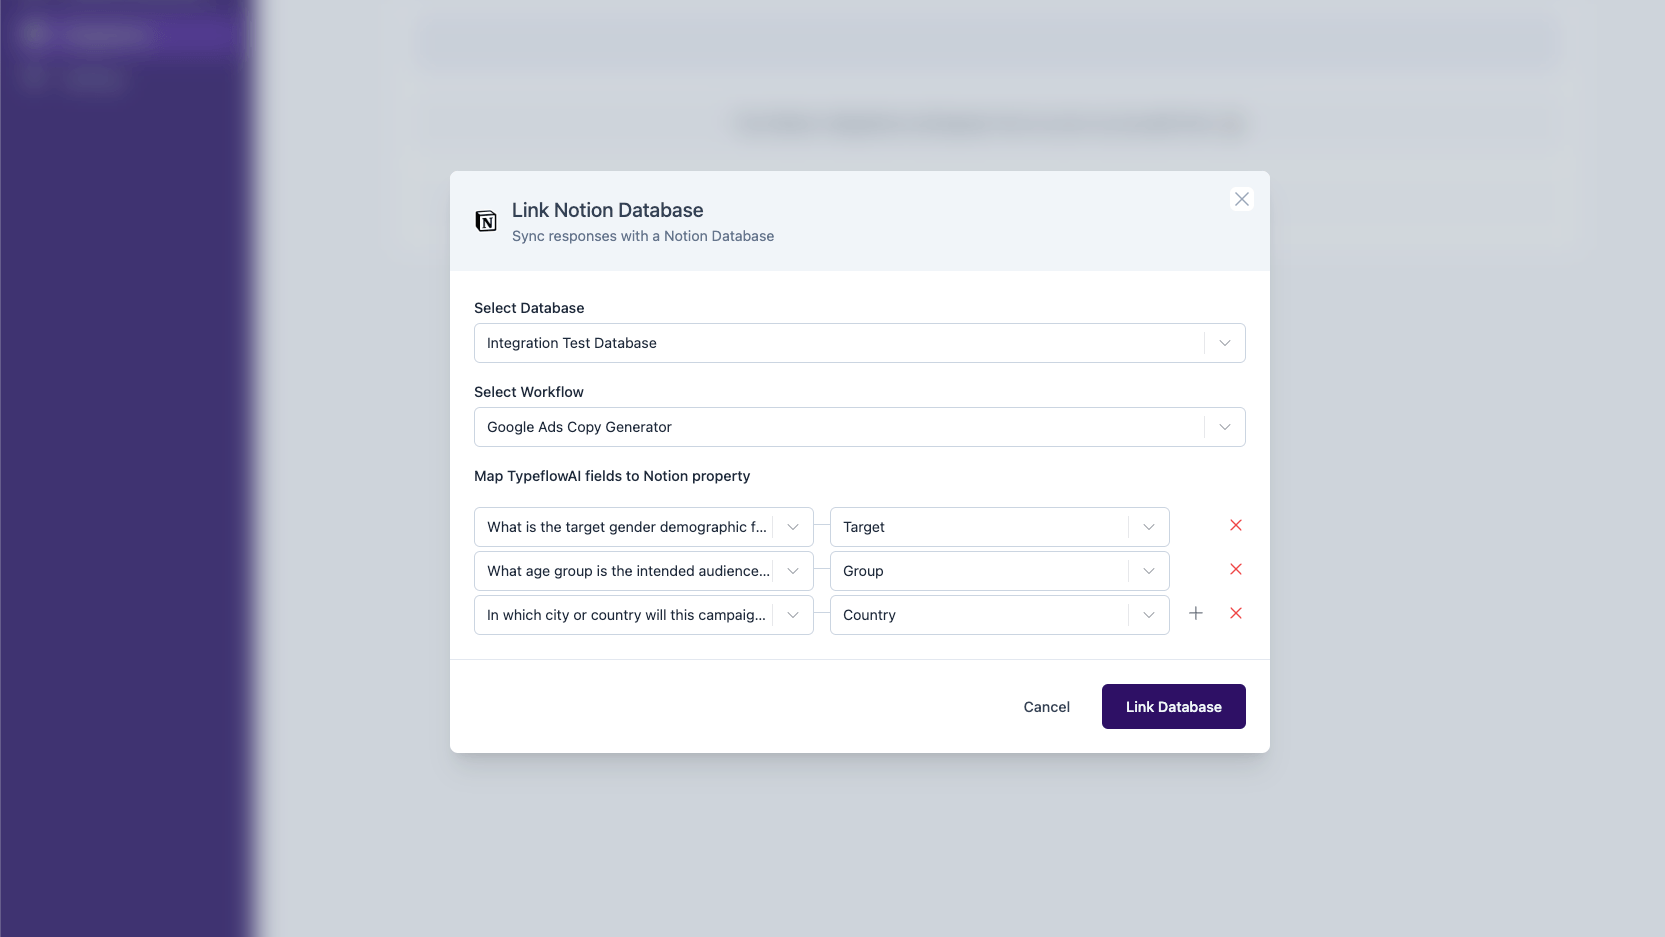
- On submitting, the modal will close and you will see the linked Notion database in the list of linked Notion databases.
Congratulations! You have successfully linked a Notion database with TypeflowAI. Now whenever a response is submitted for the linked Workflow, it will be automatically added to the linked Notion database.
Setup in self-hosted TypeflowAI
Enabling the Notion Integration in a self-hosted environment requires a setup using Notion account and changing the environment variables of your TypeflowAI instance.
- Sign up for a Notion account, if you don't have one already.
- Go to the my integrations page and click on New integration.
- Fill up the basic information like Name, Logo and click on Submit.
- Now, click on Distribution tab on the sidebar. A text will appear which will ask you to make the integration public. Click on that toggle button. A form will appear below the text.
- Now provide it the details such as requested. Under Redirect URIs field:
- If you are running typeflowai locally, you can enter
http://localhost:3000/api/v1/integrations/notion/callback. - Or, you can enter
https://<your-public-facing-url>/api/v1/integrations/notion/callback
- If you are running typeflowai locally, you can enter
- Once you've filled all the necessary details, click on Submit.
- A screen will appear which will have Client ID, Client secret and Authorization URL. Copy them and set them as the environment variables in your TypeflowAI instance as:
NOTION_OAUTH_CLIENT_ID- OAuth Client IDNOTION_OAUTH_CLIENT_SECRET- OAuth Client Secret
Voila! You have successfully enabled the Notion integration in your self-hosted TypeflowAI instance. Now you can follow the steps mentioned in the TypeflowAI Cloud section to link a Notion database with TypeflowAI.
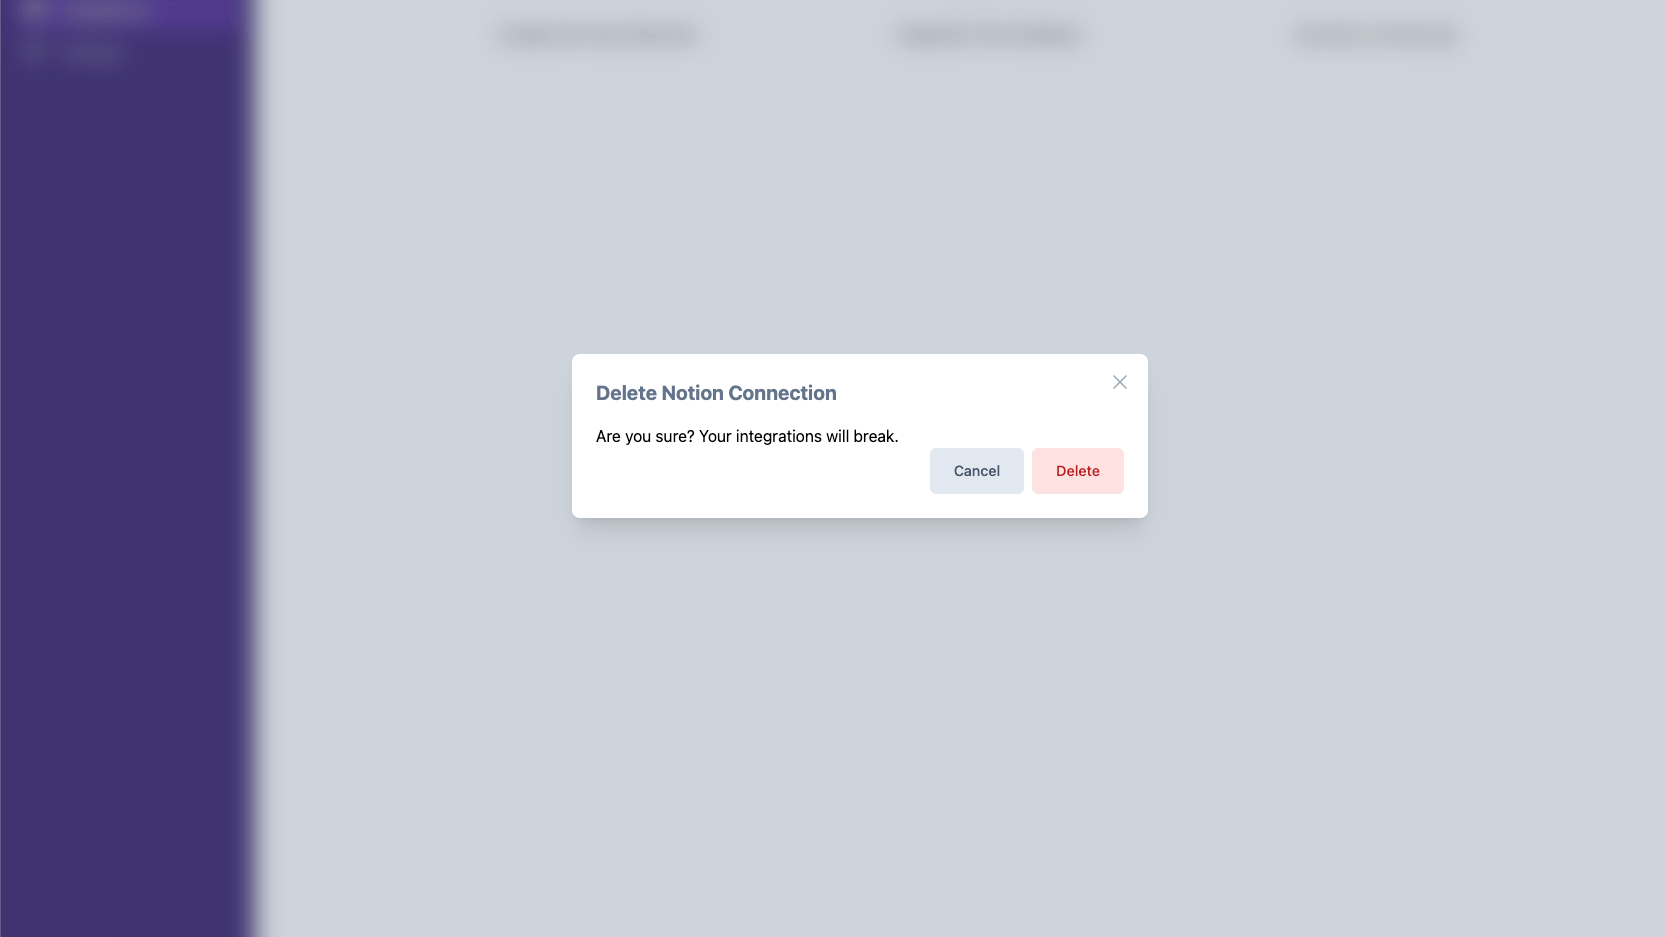
Remove Integration with Notion Account
To remove the integration with Notion Account,
- Visit the Integrations tab in your TypeflowAI Cloud dashboard.
- Select "Manage" button in the Notion card.
- Click on the "Connected with
<your-workspace-name-here> Workspace" just before the "Link new Database" button. - It will now ask for a confirmation to remove the integration. Click on the "Delete" button to remove the integration. You can always come back and connect again with the same Notion Account.